I am a very light electrical user. I don't watch much TV, I try to camp in climates where I don't use heat or ac and I use led lights as much as possible.
Speaking of LED, this lantern right here is the greatest thing since sliced bread. It is perfect for me. In fact, since I just noticed it's on sale, I'm ordering a second one. (Actually, I ordered TWO!)

I have a Phoenix Cruiser 21' motorhome with 2 group 24 batteries that are about shot. They have 2008 stickers so they're the originals. They don't hold a charge well anymore. They will be replaced within the next month, just couldn't see doing it when the rig was going to be sitting all winter. The big things I need power for are the fridge, which uses electricity even when on propane, and charging laptops, phones, tablets and camera. If I'm driving, I plug everything in and try to charge as much as possible while the engine is running anyway. When I'm camped I have the most basic portable solar setup imaginable. I started out with the 45watt Harbor Freight kit because I didn't know any better. The panels work but they're old technology and they're heavier and less efficient than new ones. And not sturdy. The plastic frame cracked the first tie I used them and the hardware all rusted that first weekend too. Back they went. However, they did work, and I went looking for a better option.
I ended up with a Renogy 100watt panel from Amazon.

This kit puts out over twice the power for the same price as the Harbor Freight one, and weighs half as much. This panel weighs 16 pounds so it's no problem to move.
I actually bought the panel, cables, connectors, and controller separately but this is a better deal. I also screwed up and bought a 10A controller which left no room for expansion. The kit above has a 30A which will allow another panel or two down the road.
***Update: in April 2014 I upgraded the controller to this one:
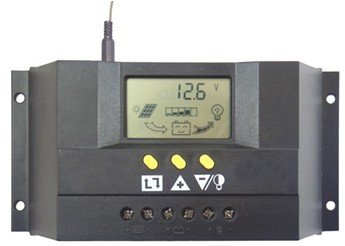
So far I really like having the display. Way nicer than old one. And I got new batteries.
I chose to not mount my panel on the roof.
First, I didn't want to climb up there.
Second, I like shade. Solar panels like sun. We each need our own space. :-)

I can park in the shade and put the panel in the sun. Yes, there's a possibility of theft. If I ever decide that's a real concern I'll use a cable lock to attach it to whatever I'm leaning it up against. Or I'll move. Who wants to park somewhere where you're worried about theft? Right now I just use a bungee so an errant gust of wind won't blow it over. In this case I got to this CG in the afternoon and just set the panel up against the grill. At sundown I turned it the other way and propped it up against the picnic table since the rig would be in the shade at sunrise. Yeah, it's a bit more difficult than set-it-and-forget-it on the roof, but I sooo much prefer being in shade if it's available that it's worth it. I plan to eventually mount one permanently on the roof at some point too. Then if there's no shade I can just use that, or use both if I need more juice.
I bought all my components separately, which meant installing MC4 connectors on my cables and controller since that's what's on the solar panel. This was a pain for someone like me who is new to all this. But even I did it. Just buy the kit though, it's less than buying the parts and no screwing around. :-)

The panel connects to the controller with cables and MC4 connectors. These connectors are made to NOT come apart easily, and they don't. In fact, you need a special tool to disconnect them. It's cheap but it's one more thing to carry, store and lose so that didn't work for me. I filed off most of the barbs on the male ends that lock the connectors together, and made sure what was left was rounded. They still lock but a good pull will disconnect them. Like any connection, pull on the connectors, not the wire. If you try this and don't file enough and they won't disconnect, two thin bladed screwdrives will probably get the tabs depressed enough to get them apart. I attached the alligator clips you see above to the output of the controller and just clip them to the battery for now. One of theses days I'll install that permanently but for now it works just fine. I had the clips left over from another charger or some other 12v thingy but you can get them at any auto parts store or from Amazon as well.
The controller is not waterproof so it sits in the battery compartment with the batteries.
I have two options for storage of the panel. Right now, while I have it in storage, I keep the panel on the ladder rack and leave it connected to the batteries. This keeps them fully charged even in this miserable winter we've had, and I have battery power when I go there to work on it or take it out for a day or whatever.


I have traveled with it on the ladder but I'm doing that less these days. Being paranoid, I bungee the hell out of it and it takes too much time and effort to secure it and then remove it. While you see one cord on the front, I use about 5 on the back, and when I'm done I think the ladder would come off before the panel did. And that's not good as the ladder is a lot more expensive to replace!! So most of the time I now throw it behind the seat.

I drape a washcloth over the corner so it doesn't dig into the wall, and use a small bungee around the headrest supports that keeps it from tipping over on curves. I didn't think that would happen. I was wrong. On Skyline Drive it leaped out from behind the seat and tried to escape through the passenger side window. I guess it wasn't thrilled with my driving. It narrowly missed hitting the window on the opposite side which could have been bad. Now I secure it. The cord & washcloth live in the seatback pocket so I don't have to search for them. The cables & controller usually get stashed in the outside compartment next door to the battery compartment. I don't like to leave it all connected to the panel, as the panel is always putting out power so if the clips get together they could spark/short. Better to disconnect it all from the panels. This is why I did the filing mentioned above.
***Another update...as of May 2014, I'm back to travelling with the panel on the ladder. I attached keyrings to the back of the panel which makes attaching the bungees a LOT easier than trying to force the hooks through the holes in the frame. And I'm down to 3 bungees. It takes 2 minutes now and I'm not dragging sand & spiders inside.

Now, to the usage. I have a 2000w whole house inverter built into the rig that I seldom use. It works great but draws 12 amps just sitting there. No bueno. I use it for the TV and that's about it. OR if I'm driving, I have that on & plug lots of stuff in to charge. When parked, I have one 12v socket that is wired to the house batteries. These are generally fused at 10A so one should not attempt to draw more than 100w. I do NOT want to blow that fuse as god alone knows where it is but I guarantee it's a struggle to get to. That said, I live on the edge and use this inverter:

Schumacher XI75DU 750 Watt DC to AC Digital Display Power Inverter
I've had it for a few years and used it in my car before I got the RV and never blew a fuse. It claims less than 1A resting current draw. It runs my laptop and Nikon battery charger just fine. I have yet to draw over 60w with those. You could certainly get a smaller one cheaper. This one will power stuff like drills, etc, you just have to connect directly to a battery for that. I do plan to add another house 12v outlet at some point as well. They're handy.
Hope this info helps.
Update: In July 2014 I added 2 flexible 100w Renogy panels. They were $215 each. While I LOVE the weight, they are dirt magnets and the dust adheres to the the plastic like it's glued on. It can't be easily brushed or blown off, I need to wash them. The glass panels are much easier to keep clean. Also, the plastic ones do not put out as much power. The technology still needs work.
Gail - I read your comment on Roxi's site about wanting a sign that your site is occupied. I made one up that I print out and put in a plastic sheet protector and clip onto my chair or table or ?? Send me your e-mail and I'll send you my Word doc that has it. You just have to print it out. I gave Roxi one to use, too. (Why re-create the wheel?) Barbara - of Me and My Dog ...and My RV (Katie's mom) sm92078@aol.com
ReplyDelete